
How to Set Up a Mentorship Flow in Bob
This article explains how to set up a mentorship flow in Bob that enables employees to request mentors through a self-service flow, while giving admins control over mentor availability and preventing duplicate mentor requests. Note: Admin permissions are required to complete this setup.
Create the Required Custom Fields
Start by creating two custom fields in the Work category, which already has suitable default permissions.
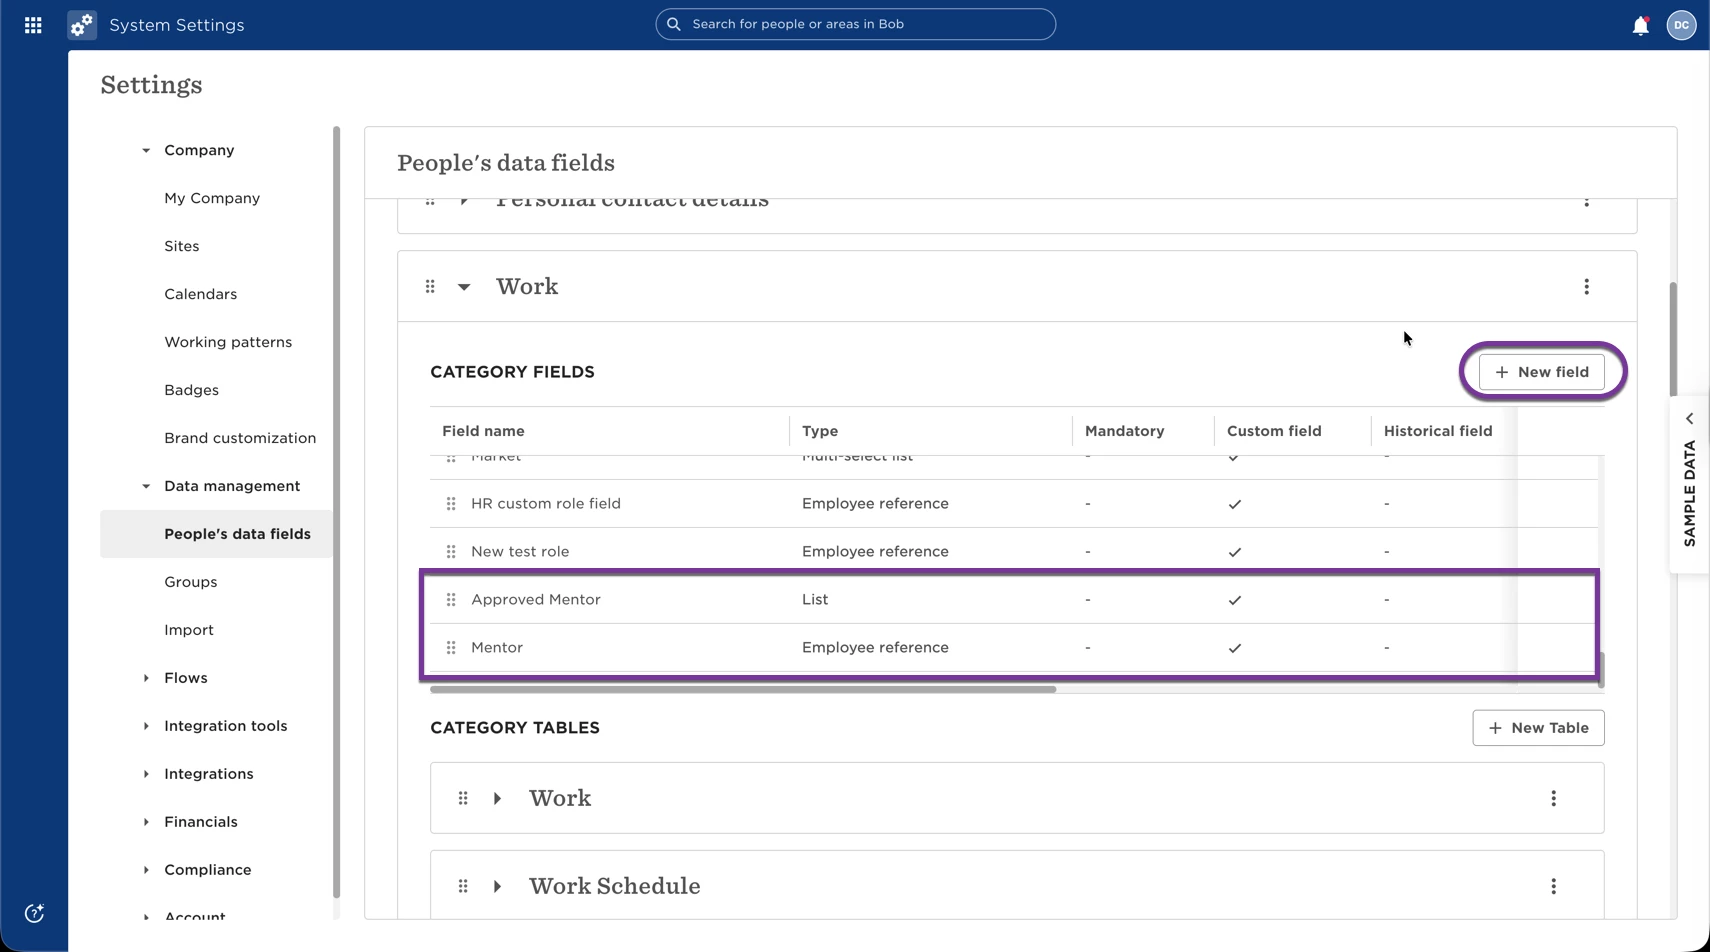
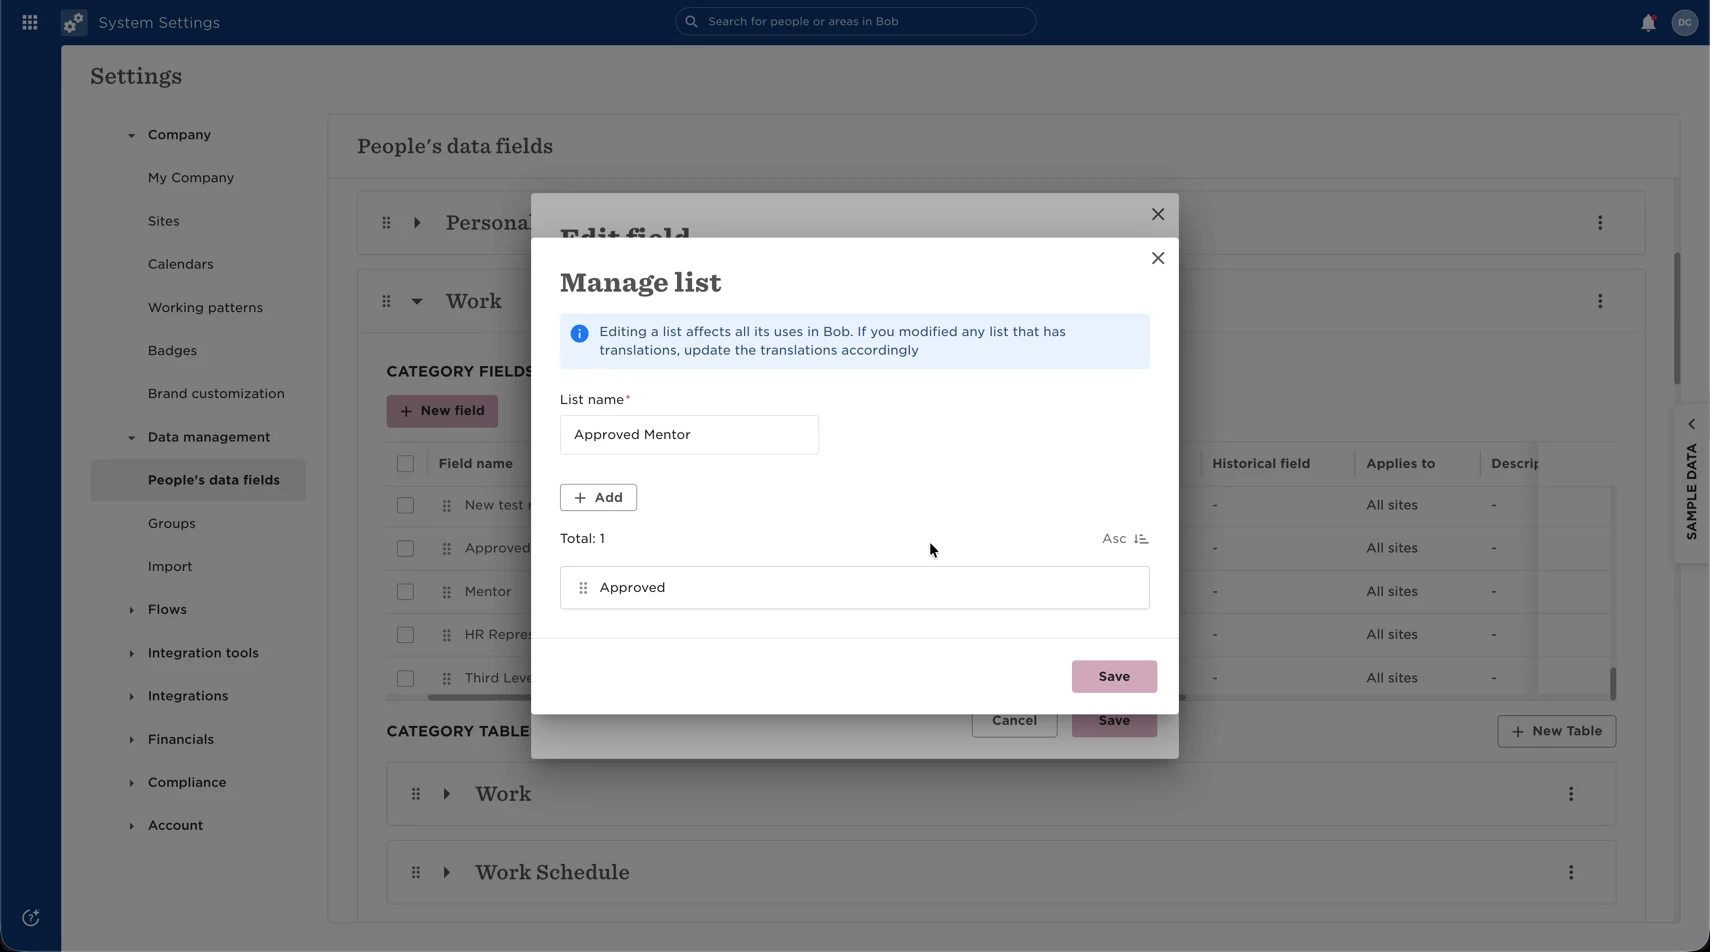
- Go to System Settings → Data Management → Work and create a list field called Approved as mentor (you can rename it if needed). Add a single value: Approved. You don’t need a “Not approved” option; leaving the field empty works the same way.
- Next, create a second field in the same category:
- Field type: Employee reference
- Name: Mentor
- Approved as mentor = Approved
At this stage, a mentor can have multiple mentees by default, and there’s no system limit on how many employees can be mentors. If you want to restrict mentors to a single mentee, see the optional section later in this article.
Create the Mentorship Flow
With the fields in place, you can now create the mentorship flow.
- Go to System Settings → Flows → People Data Updates and create a new template. Give the flow a clear name (e.g., Mentorship), set it to apply to all employees, and include the Mentor field.
- Configure the approval path and access settings that fit your process, then save the flow.
Allow Employees to Run the Flow
After creating the flow, allow employees to run it.
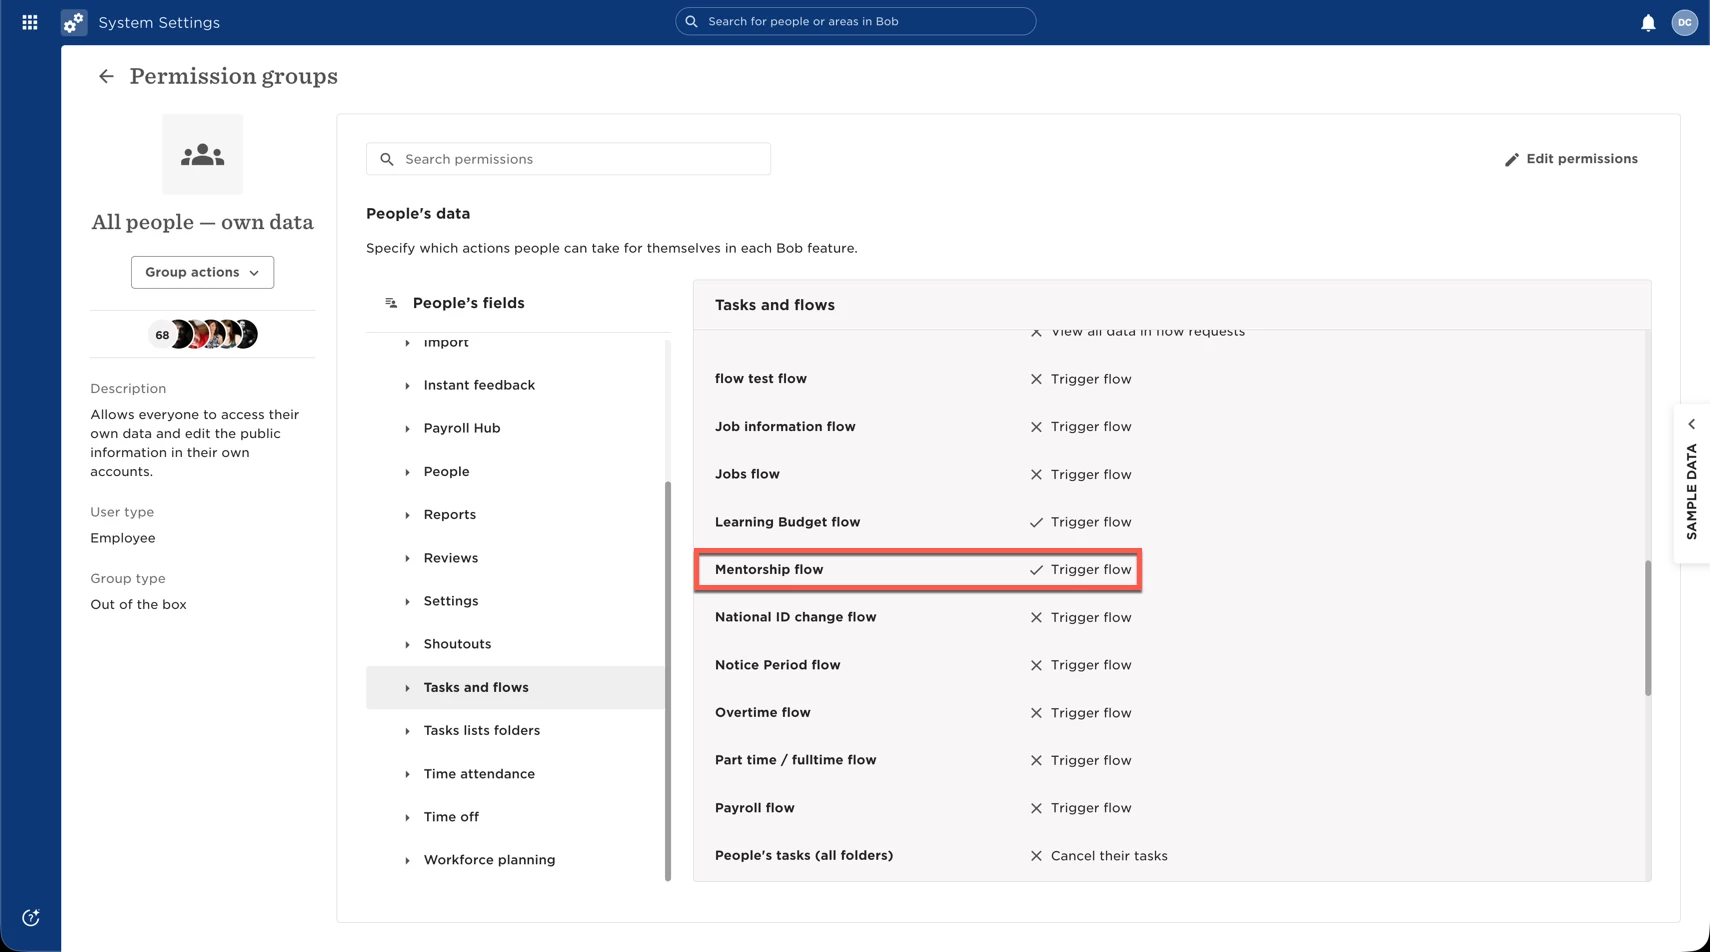
- Go to System Settings → Account → Permission Groups, open All People – Own Data, and under Tasks and Flows, enable permission to run the mentorship flow.
You don’t need to update permissions for the custom fields, as the Work table permissions already apply.
Approve Employees as Mentors
Next, approve employees who can act as mentors.
- If you only have a few mentors, you can update their profiles manually by setting Approved as mentor to Approved.
- If you have many mentors, importing is more efficient.
- To import mentors, first create a report:
- Go to Analytics → Reports → Add report → From scratch → General
- Add the Email field and export the report
- In the exported file, populate Approved as mentor with Approved only for employees who should be mentors, leaving the rest blank.
- Import the file via System Settings → Data Management → Import, choosing Add or Update People’s Information and using employee email as the identifier.
- To import mentors, first create a report:
Use the following help center articles for more assistance if required: Import / Reports
Validate the Setup
To validate the setup, run the mentorship flow as an employee and select an approved mentor.
Once the request is approved, the selected mentor will be assigned to the employee. Depending on how you configure the flow, you can also:
- Add approval steps for additional control
- Set up notifications when the flow is completed
- Trigger task lists once the flow is completed (if approval is required, the task list will trigger only after the approval is fully completed)
Limit Each Mentor to One Employee (Optional)
If you want to ensure that each mentor can only be assigned to one employee, add an additional condition to the Mentor field:
- Approved as mentor = Approved
- Mentor is not assigned as
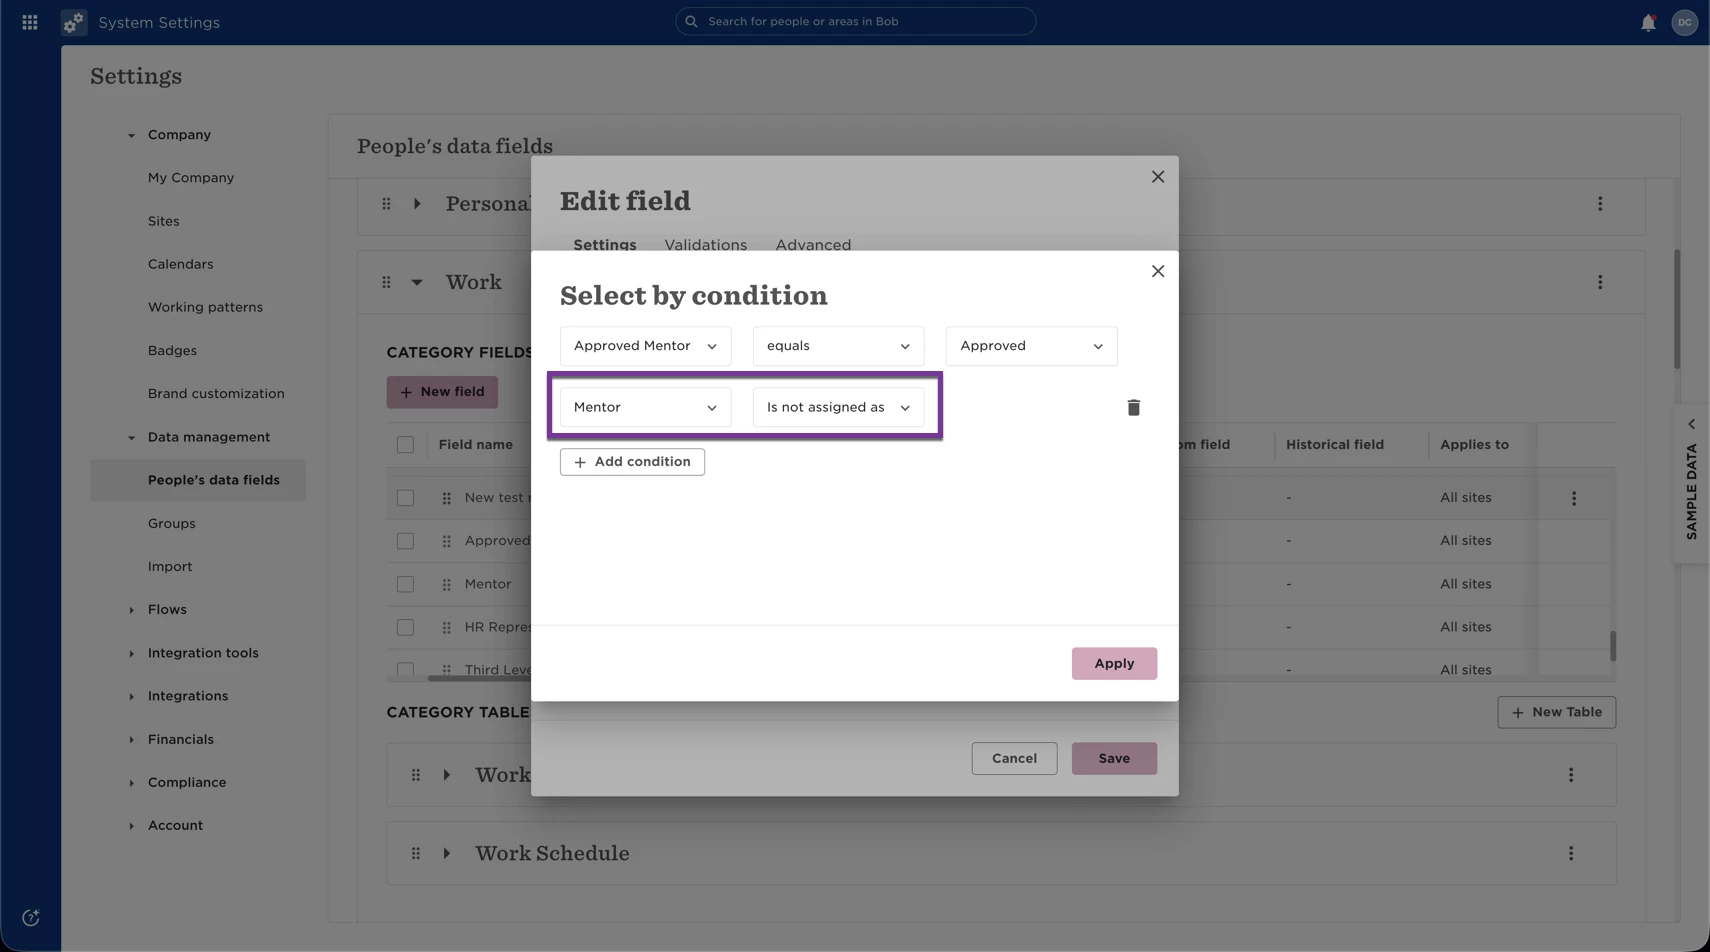
This ensures that mentors who are already assigned won’t appear as options for other employees, helping avoid duplicate requests and manual rejections. When you run the flow again for another employee, any mentor who is already assigned will no longer appear in the list.
Important to know:
If two employees submit requests for the same mentor before either request is approved, the mentor may temporarily appear in both submissions. Once one request is approved, the mentor will be effectively marked as unavailable for new requests.