


Use permission groups to ensure employees can only see people from their own entity, while allowing a designated entity to view everyone across all entities.
In this example, three entities share the same Bob account:
- Entity 1
- Entity 2
- Entity 3
Employees in Entity 1 should only see Entity 1 employees, employees in Entity 2 should only see Entity 2 employees, and employees in Entity 3 should be able to see everyone.
Before creating custom permission groups, you'll first need to update the out-of-the-box All People – Others Data permission group.
- Go to System Settings > Account > Permission groups.
- Open All People – Others Data.
- Under People's data, locate Access for.
- Edit the condition:
- Lifecycle status equals Employed.
- Site doesn't equal All sites (select every site).
- Save the changes.
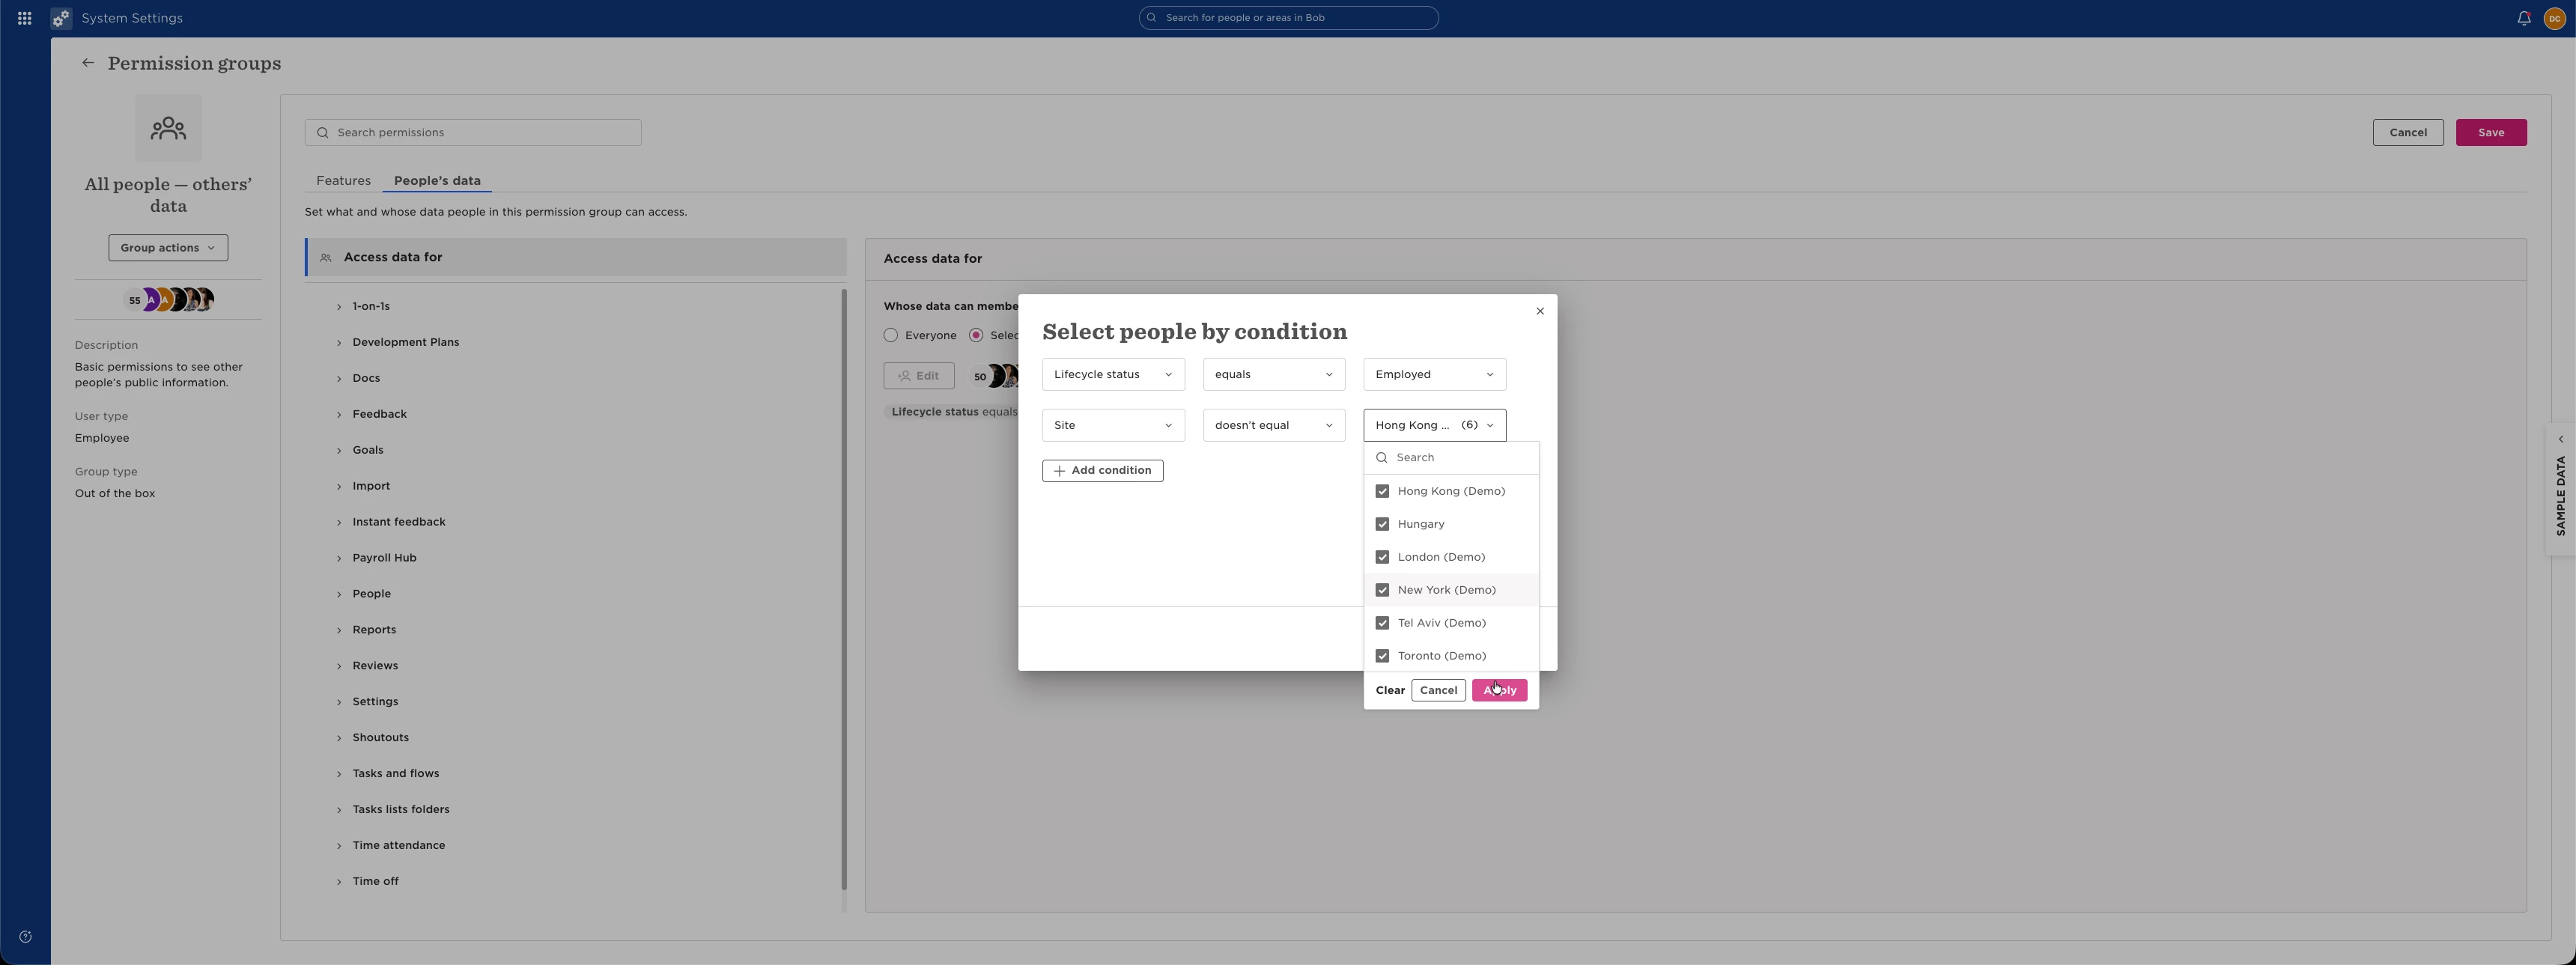
{placeholder: Screenshot of the updated All People – Others Data permission group. Highlight the Access for condition.}
This prevents employees from seeing other employees by default while still allowing the permission group to be used as the baseline for custom permission groups.
Important: Before making additional changes, take screenshots of the permissions in this permission group. You'll use them as a reference when configuring the custom permission groups below.
Next, create a permission group for employees in Entity 1.
- Go to System Settings > Account > Permission groups.
- Click Create new permission group.
- Name the permission group (for example, Entity 1 – Employee Access).
- Select Employee as the permission group type.
- Under People by condition, configure:
- Site equals all Entity 1 sites.
- Lifecycle status equals Employed or Hired.
- Under People's data > Access for, configure:
- Site equals all Entity 1 sites.
- Lifecycle status equals Employed or Hired.
- Grant the same permissions as All People – Others Data.
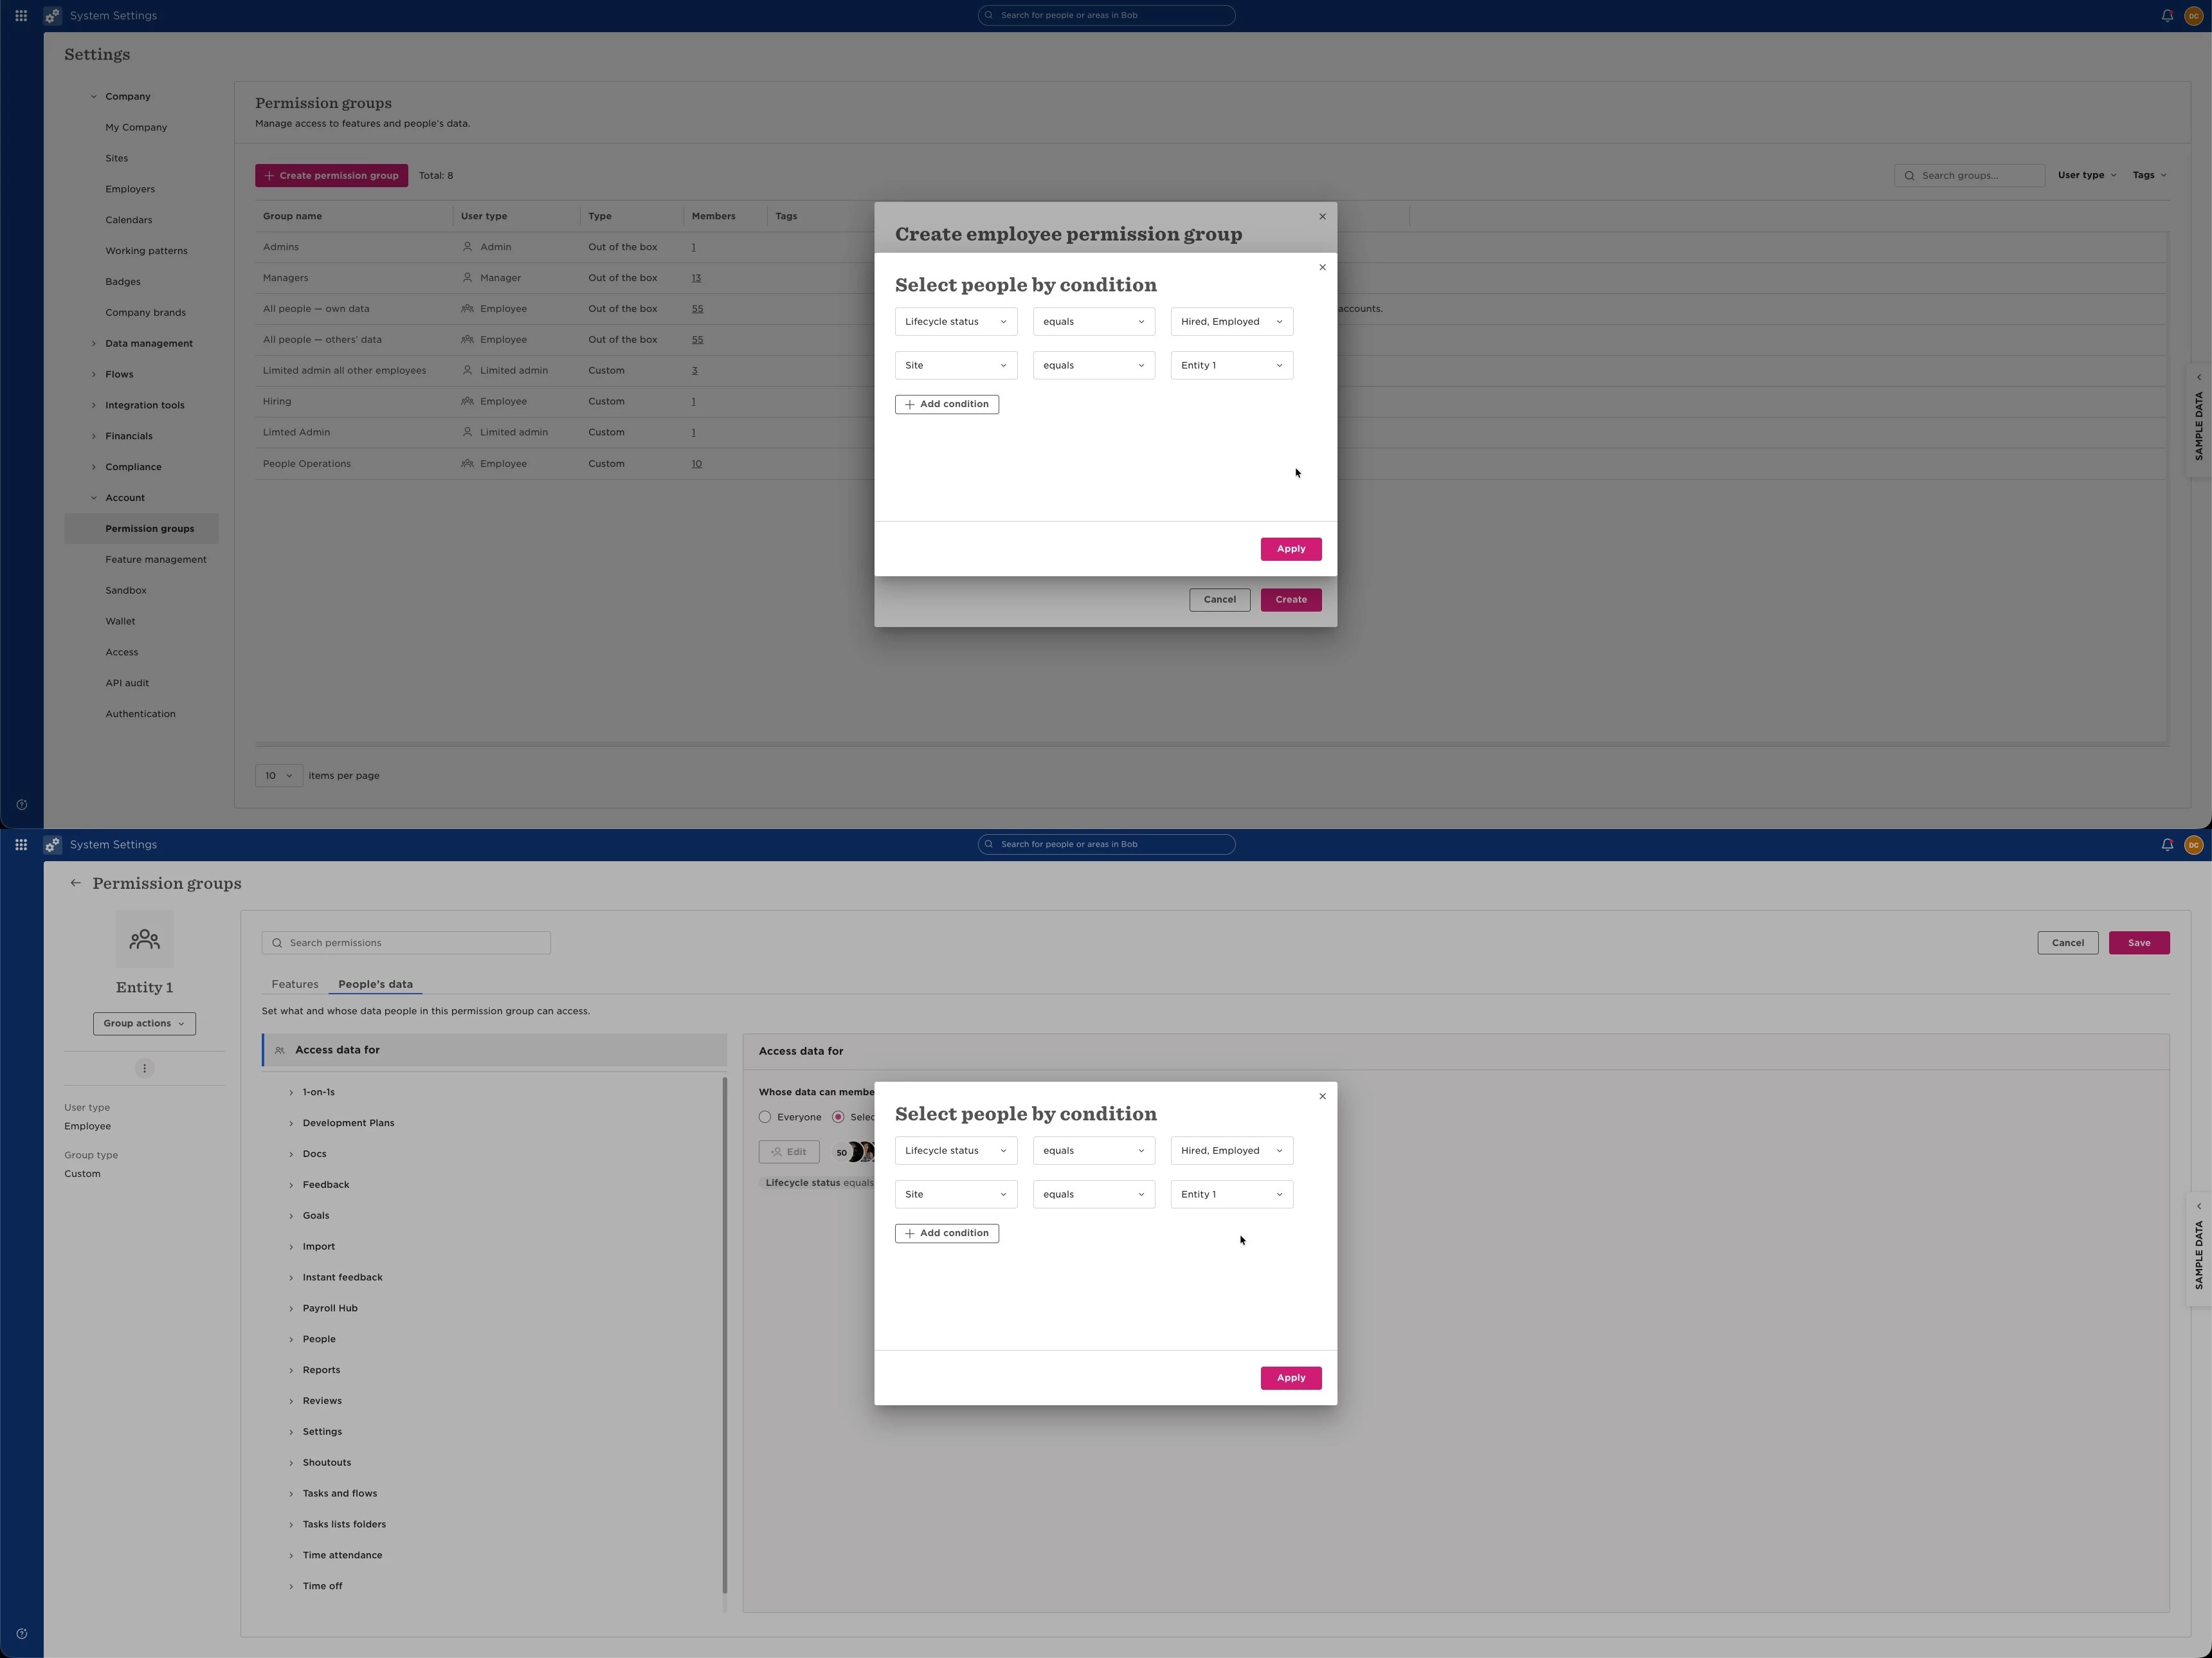
Employees assigned to Entity 1 sites will only be able to view other employees in Entity 1.
Create a second permission group for employees in Entity 2.
- Click Create new permission group.
- Name the permission group (for example, Entity 2 – Employee Access).
- Select Employee as the permission group type.
- Under People by condition, configure:
- Site equals Entity 2.
- Lifecycle status equals Employed or Hired.
- Under People's data > Access for, configure:
- Site equals Entity 2.
- Lifecycle status equals Employed or Hired.
- Grant the same permissions as All People – Others Data.
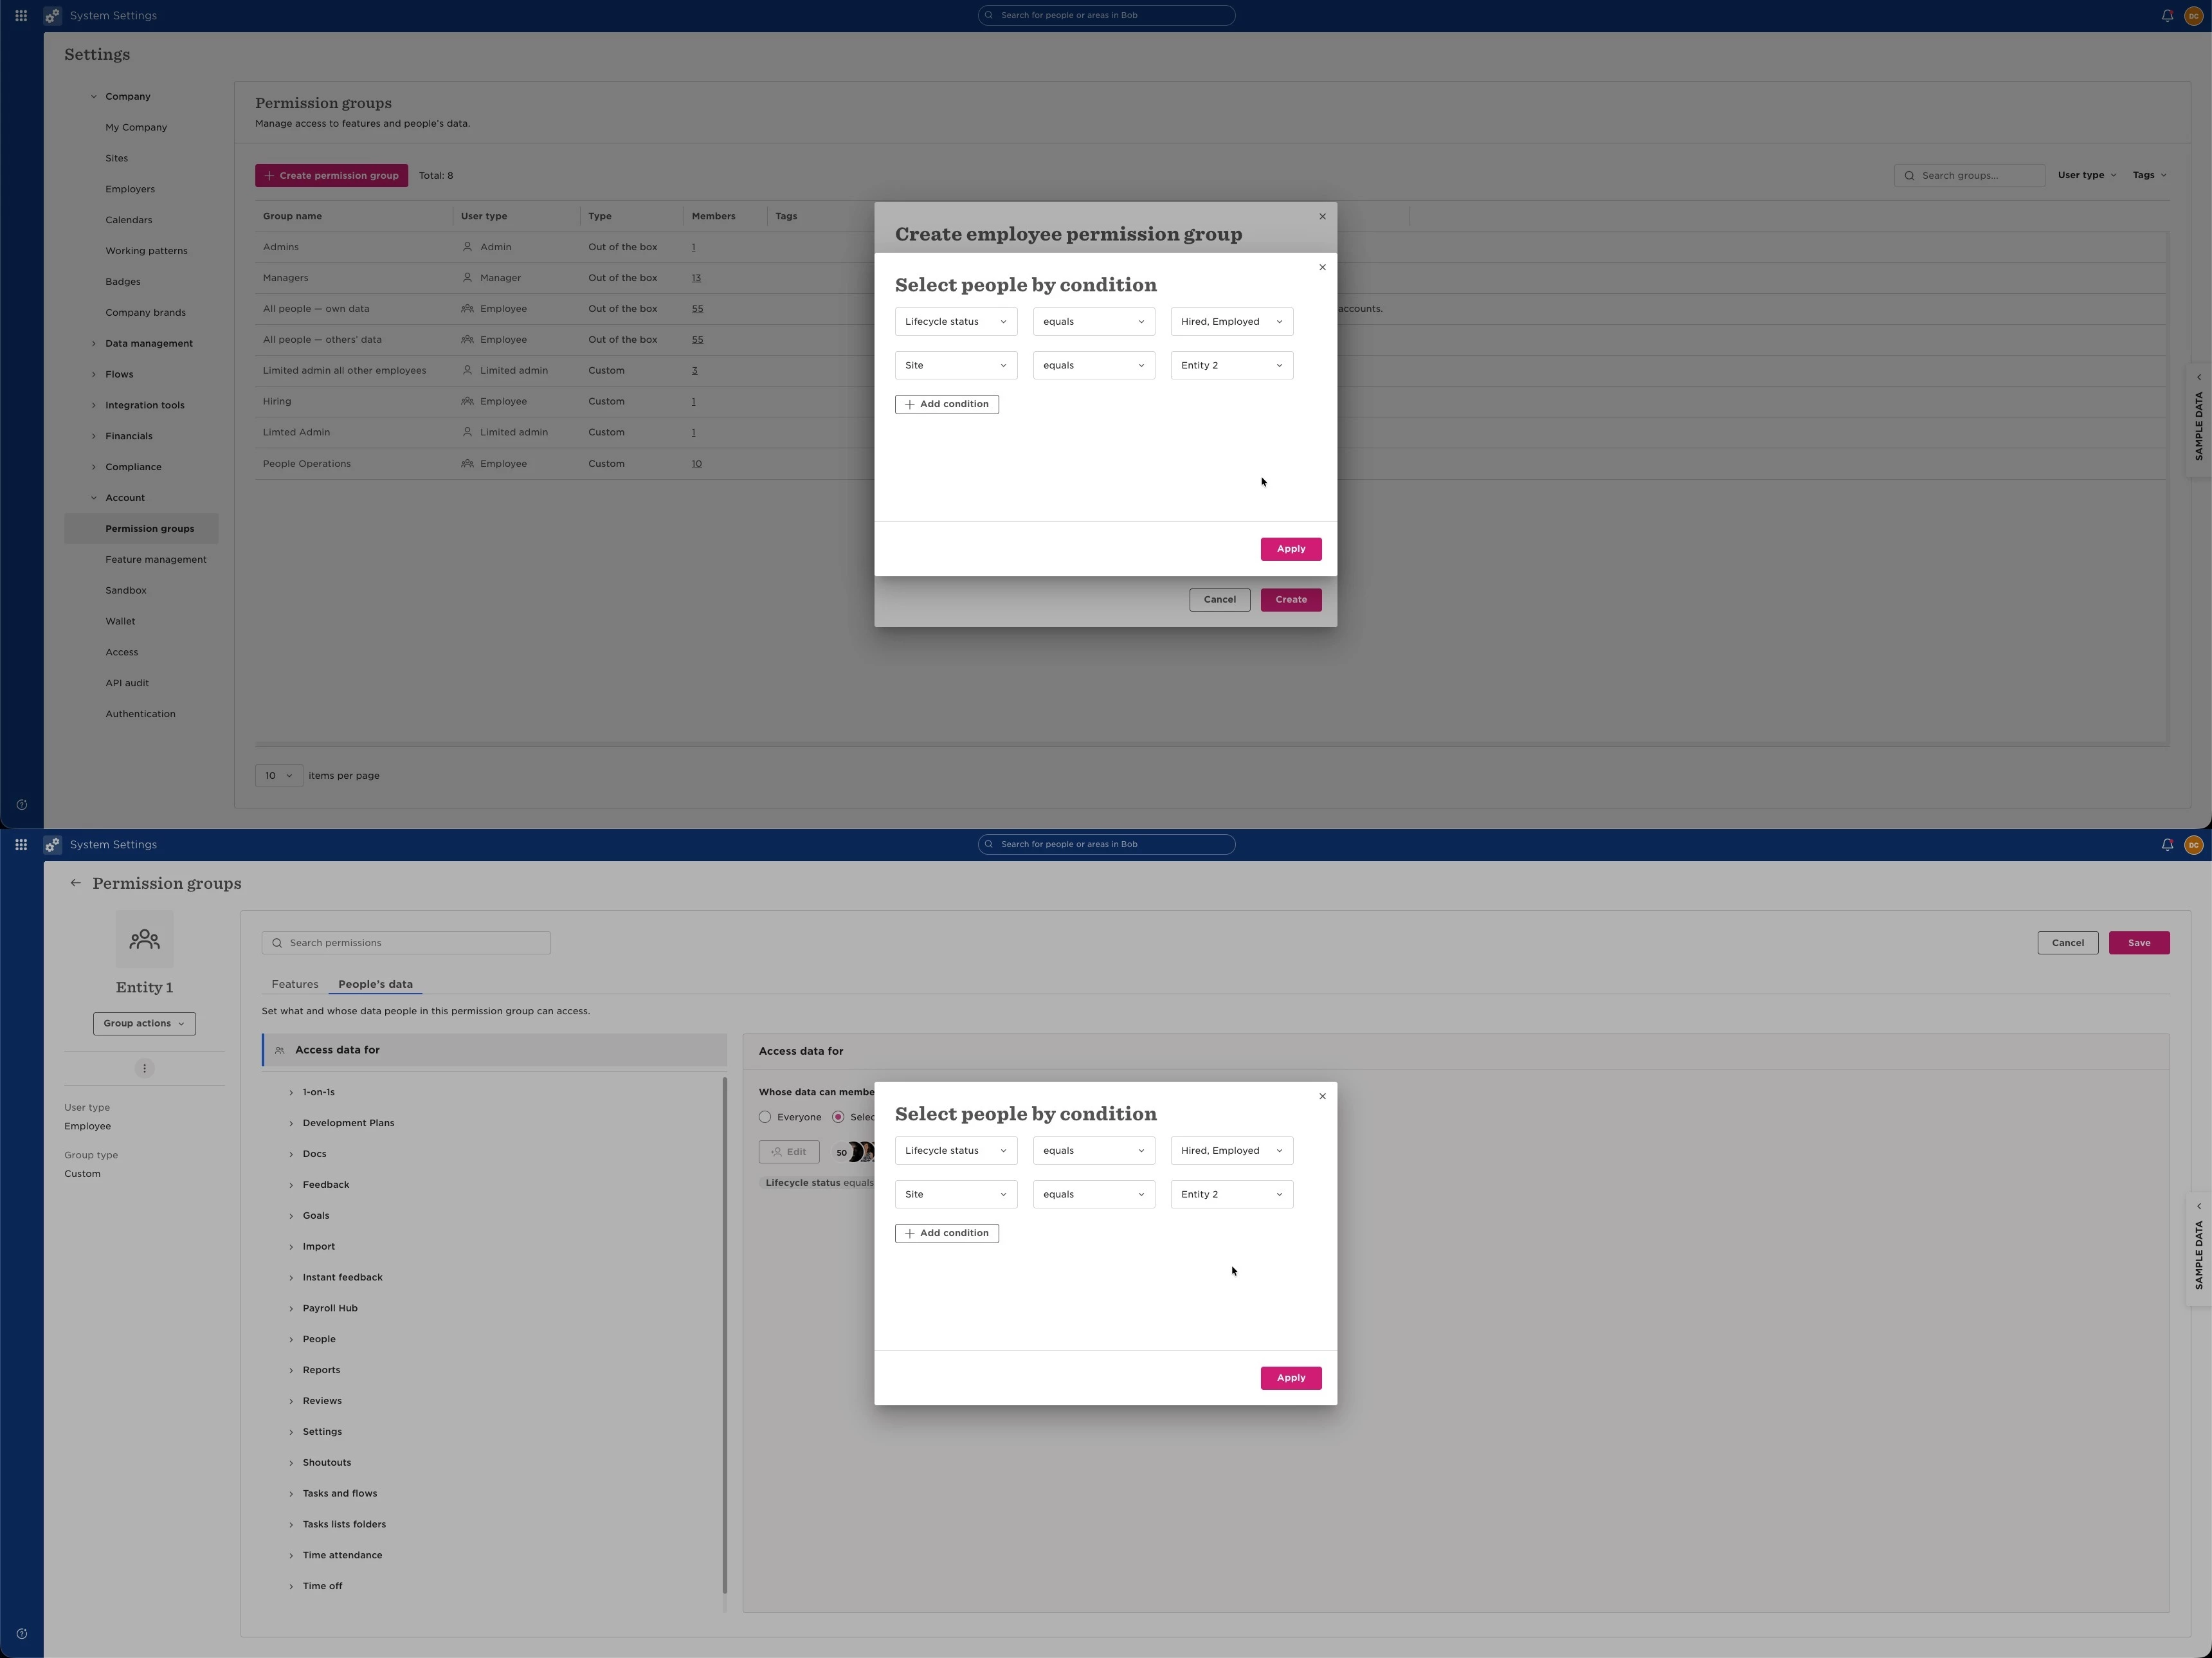
Employees assigned to Entity 2 will only be able to view other employees in Entity 2.
Finally, create a permission group for employees in Entity 3.
- Click Create new permission group.
- Name the permission group (for example, Entity 3 – Full Visibility).
- Select Employee as the permission group type.
- Under People by condition, configure:
- Site equals Entity 3.
- Lifecycle status equals Employed or Hired.
- Under People's data > Access for, configure:
- Lifecycle status equals Employed or Hired.
- Grant the same permissions as All People – Others Data.
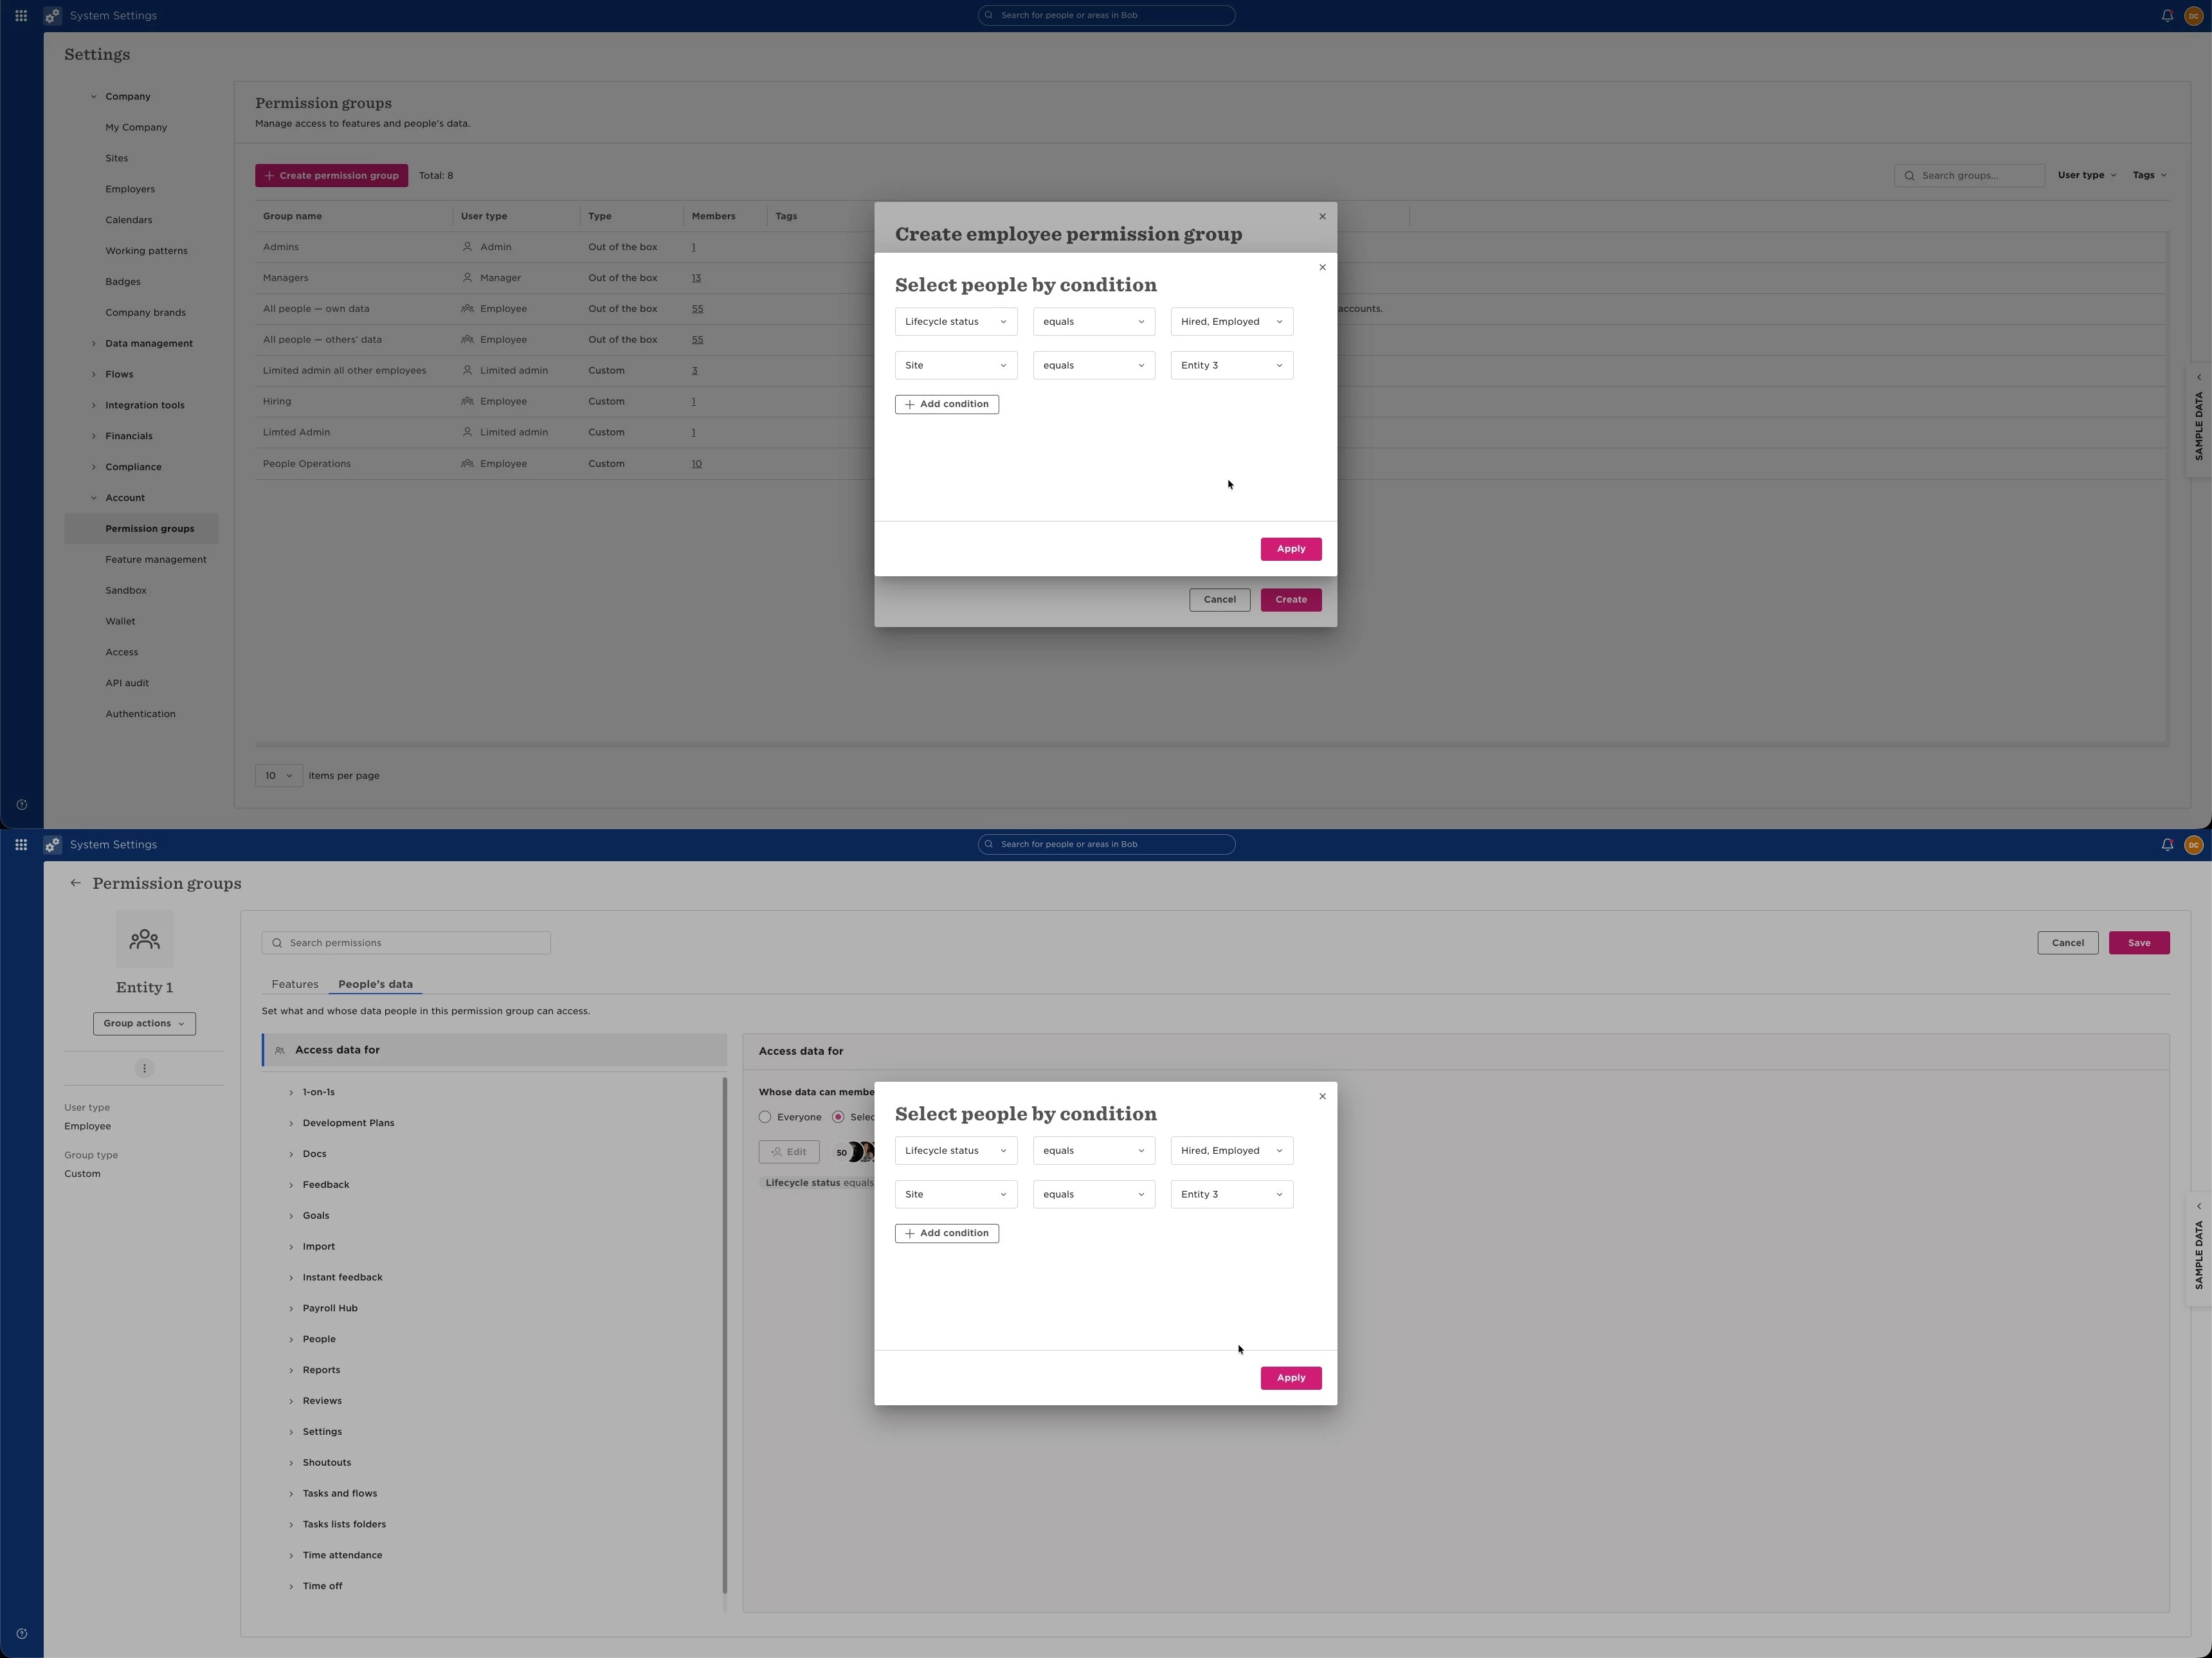
Employees assigned to Entity 3 will be able to view employees across all entities.
Future hires
All new employees are automatically added to the out-of-the-box All People – Others Data permission group. You can't control membership of this permission group—only the visibility it grants but since it doesn’t allow access to any employee, it is okay
Once you've completed the configuration above, no further changes are needed to this permission group.
For new hires, simply assign the correct site:
- Entity 1
- Entity 2
- Entity 3
Employees will automatically be included in the appropriate custom permission group based on the conditions you've configured.