
Firstly you will need to have an employee with this column populated.
Then go to our API documentation page and go to the call ‘List employee's life-cycle status
history’.
Take the employees ID from the profile page URL as displayed here:
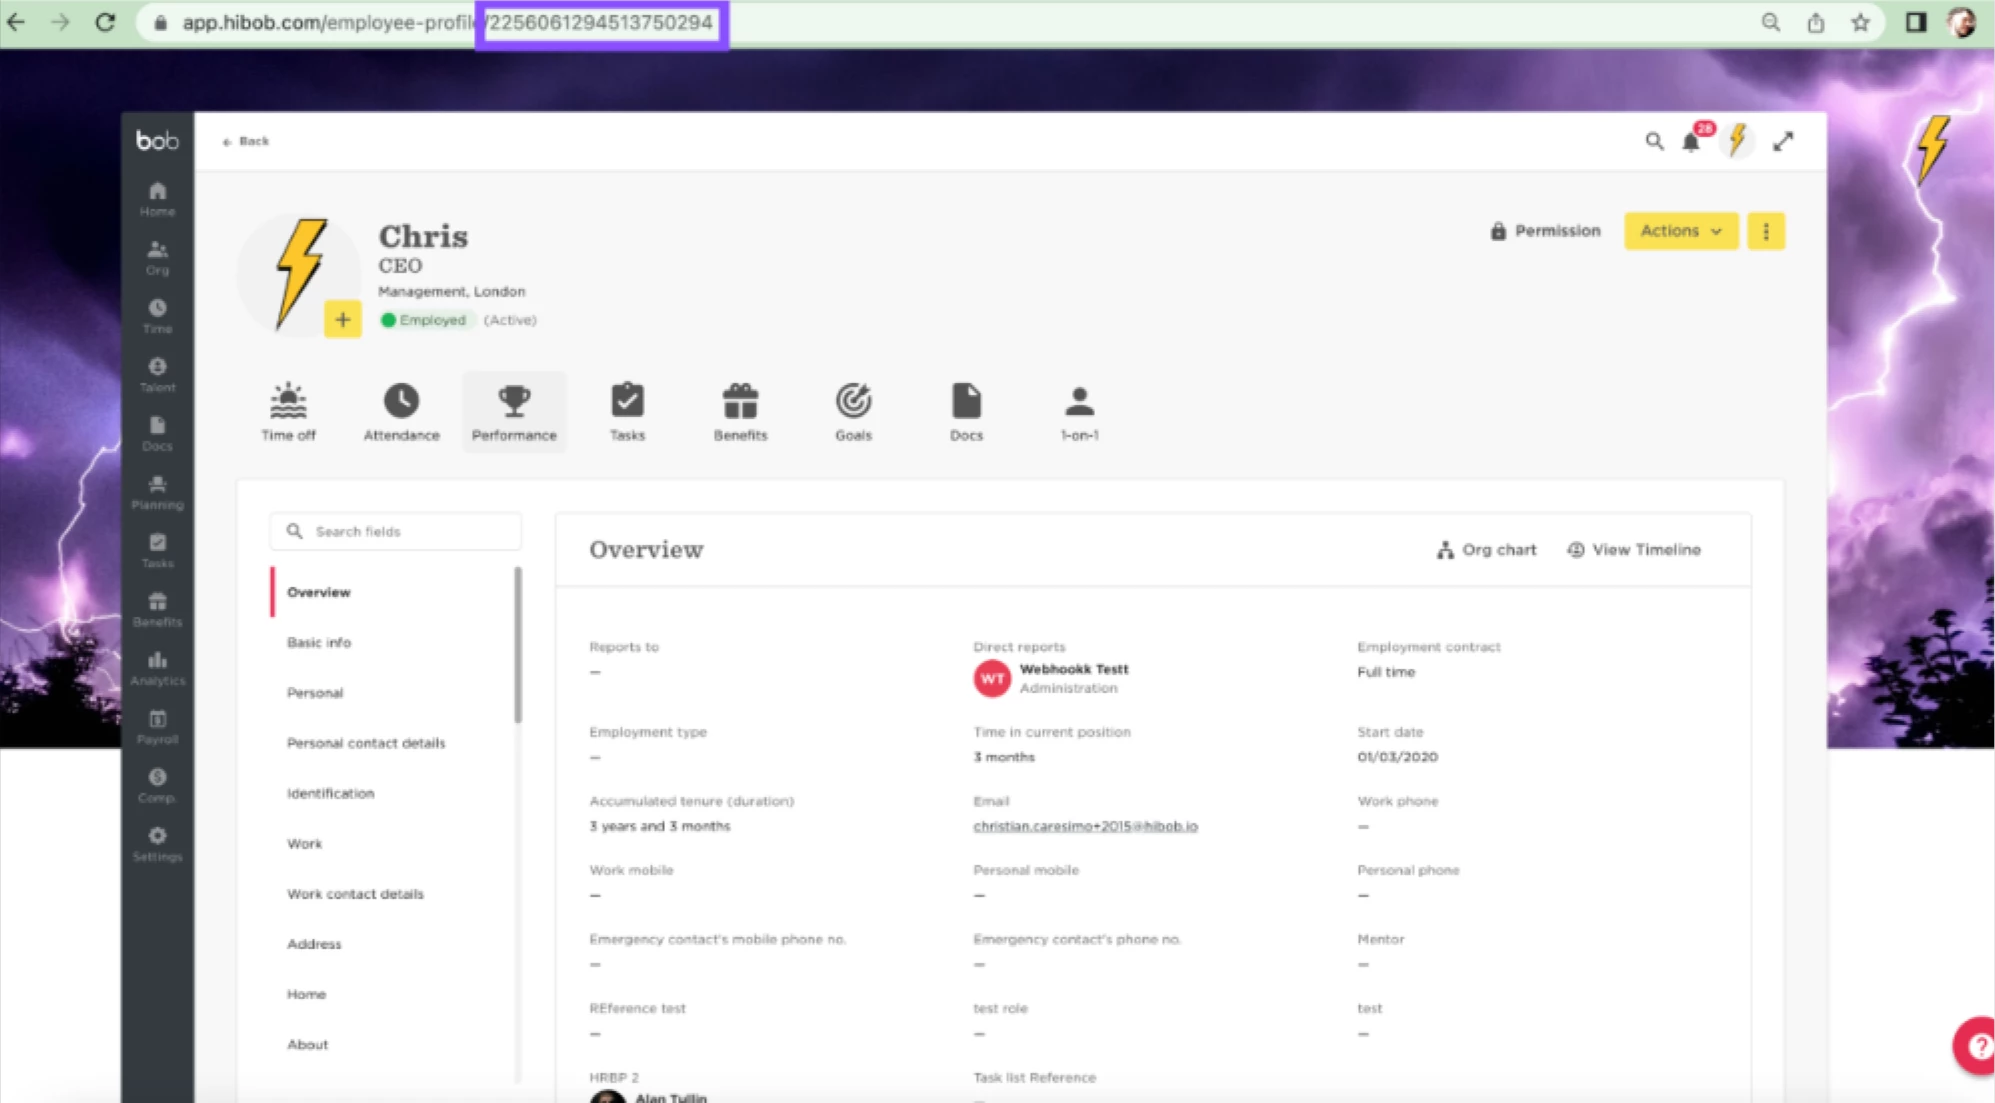
Place this is the employee ID section on the call and then click try it:

Copy the output and paste this in a JSON viewer if showing a lot of data in the output and then
use the search function (Mac is Command+F, windows is Windows logo key + S) then search
for the value that has been populated on the employees profile in the custom column. For
example on my employees profile the custom column value is populated with a list value and a
text value:
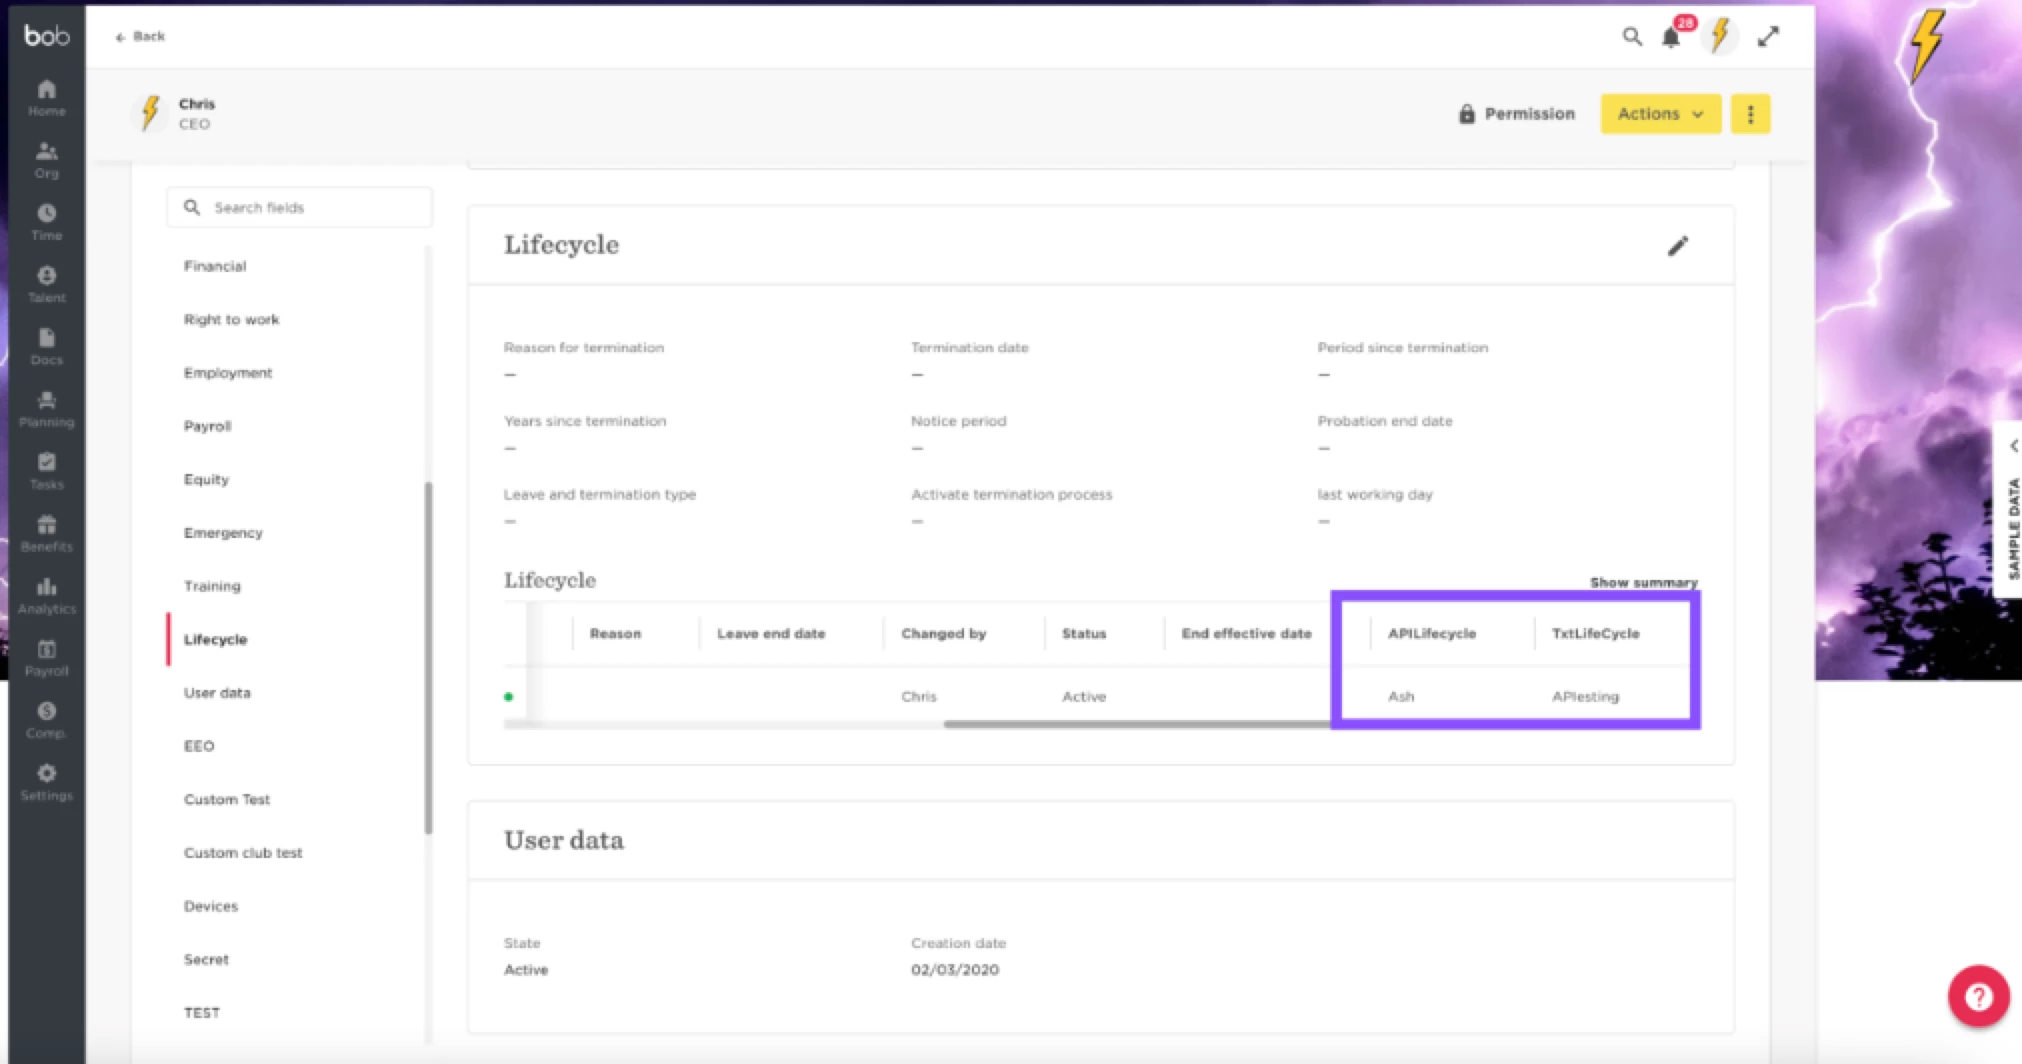
So in the output I will search for text value as this will show as displayed on the profile. Custom
list values will show as numeric.
This will show in the order of the custom columns added left > right in a column sequence. For
example APILifecycle field will show first in the order then the TextLifeCycle will follow:
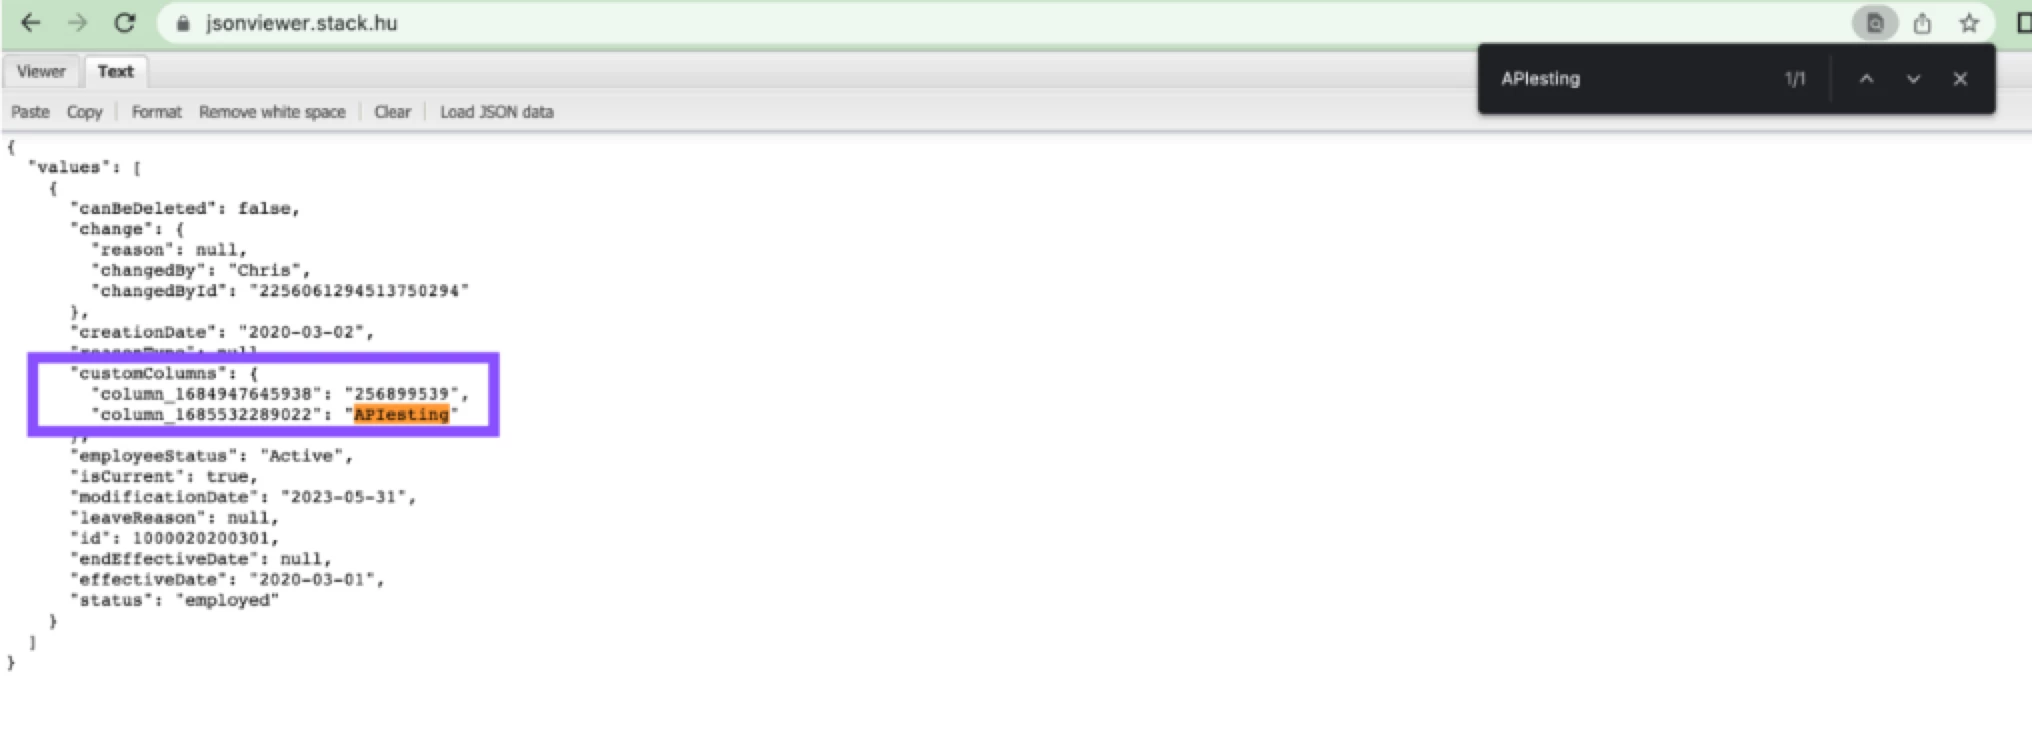
You can see the structure will show "customColumns": {‘ This will be all the custom columns
you have in the table. You will then see the column ID’s associated with each column.
So on the profile the custom columns for this example are:
APILifecycle (List type) = ID "column_1684947645938"
TxtLifeCycle (Text type) = ID "column_1685532289022"